I have written various individual blog posts on PowerShell creation of all configurational task for Windows 365 Cloud PC under Microsoft Endpoint Portal (MEM).
Based on public demand, I want to create a consolidated post for all the scripts and configuration items that can get you started with Windows 365 Cloud PC using PowerShell: (Of course all the below features can also be configured using the UI, however below is the guidance strictly using PowerShell)
PowerShell links to my blog post
Following are the links to my blog post for each and individual task:
I promise you once you have done the hard work, you can get up and running in a few hours using all the above PowerShell scripts with Windows 365 Cloud PC.
GitHub Link
Here is the repo with all the scripts and more – askaresh/avdwin365mem (github.com). A big thanks to Andrew Taylor for collabrating and updating the Provisioning policy script with the SSO details that was release in late Nov 2022.
I hope you will find this helpful information for all things PowerShell w.r.t Windows 365 Cloud PC. I will update the post if I publish or update more information.
If you want to establish a network connection that allows communication between the Windows 365 Cloud PC and the existing Azure Virtual Network (ANC), then keep following this post. Today, I will demonstrate the Powershell method of creating the Azure Network Connection (ANC). Note that we need information from the Azure Portal to make sure you have all the necessary information handy or/or involve the necessary teams who can provide you with the information on Azure Networking.
Overview
Create the ANC first before creating the Win365 – Cloud Provisioning Policy (CPP)
If the ANC precreated then during the cloud provisioning of the Cloud PC desktops it will create them on the Azure VNET on your desired subnet
Make sure you have a working DNS configured on the VNET which can communicate with your on-premise network using express route or other Azure VNETs
Open necessary firewall ports based on your requirements on the NSG or Azure Firewall for the communication to your on-premise network using express route or other Azure VNETs
Permissions
Intune Administrator in Azure AD
Cloud PC Administrator
Global Administrator
If you decide to alter or change the ANC, you will have to reprovision the Cloud PC, and it’s a destructive activity. Make sure you architect it properly
You can delete your ANC however, you will have to update your cloud provisioning policy with the new ANC first, and then you can delete the existing ANC.
Connect to MS Graph API
Step 1 – Install the MS Graph Powershell Module
#Install Microsoft Graph Module
PS C:WINDOWSsystem32> Install-Module Microsoft.Graph.Beta
Step 2 – Connect to scopes and specify which API you want to authenticate. If you are only doing read-only operations, I suggest you connect to “CloudPC.Read.All” in our case, we are creating the ANC, so we need to change the scope to “CloudPC.ReadWrite.All”
#Read-only
PS C:WINDOWSsystem32> Connect-MgGraph -Scopes "CloudPC.Read.All" -NoWelcome
Welcome To Microsoft Graph!

OR

#Read-Write
PS C:WINDOWSsystem32> Connect-MgGraph -Scopes "CloudPC.ReadWrite.All" -NoWelcome
Welcome To Microsoft Graph!
Step 3 – Check the User account by running the following beta command.
#Beta User
PS C:WINDOWSsystem32> Get-MgBetaUser -UserId admin@wdomain.com
Connect to Azure & Grab Details (Variable Region)
We are logging into Azure to grab all the details regarding to Resource Group, Subscription ID/Name, VNET and Subnets
Connect to the Azure Portal using the necessary credentials
Select the Azure Subscription that holds all the networking information
A display name of the Azure Network Connection – ANC – (ANC-W365-Sub01)
What is the join type of the ANC of the golden image virtual machine (azureADJoin)
Resource Group ID of the existing resource group. You will have to enter the resource group name (W365-AVD-RG01), and it will get us the ID we need.
Name of the existing subnet within the vNET (W365Workload-Sub01), and it will get us the ID we need.
Name of the existing VNET used for the connection. You will have to enter the VNET name (W365-AVD-VNET01), and it will get us the ID we need.
Connection to the MS Graph API and ensure you have the necessary write permissions.
We are using the beta API for Cloud PC
# Connect to the Azure Subcription
Connect-AzAccount

# Get existing context
$currentAzContext = Get-AzContext

# Your subscription. This command gets your current subscription
$subscriptionID = $currentAzContext.Subscription.Id

# Your subscription. This command gets your current subscription name
$subscriptionName = $currentAzContext.Subscription.Name

# ANC Display Name
$ancdname = "ANC-W365-Sub01"

# Join Ype for the Azure Network Connection
# Two types Azure AD and Hyrbird "azureADJoin" or "hybridAzureADJoin"
$ancjointype = "azureADJoin"

# Get your Win365 Resouce Group id for RG Name - W365-AVD-RG01
# Put your RG Name
$win365RGID = Get-AzResourceGroup -Name "W365-AVD-RG01" | Select-Object -ExpandProperty ResourceId

# Get your Azure VNET id used for Windows 365 Cloud PC
# Put your VNET Name
$win365VNETID = Get-AzVirtualNetwork -Name "W365-AVD-VNET01" | Select-Object -ExpandProperty Id

# Get your Subnet ID within the Azure VNET for Windows 365 Cloud PC
# Put your VNET Name
$win365VNET = Get-AzVirtualNetwork -Name "W365-AVD-VNET01"

# Enter your Subnet Name
$win365SubID = Get-AzVirtualNetworkSubnetConfig -Name "W365Workload-Sub01" -VirtualNetwork $win365VNET | Select-Object -ExpandProperty Id

# Connec to MS Graph for Cloud PC W365
Connect-MgGraph -Scopes "CloudPC.ReadWrite.All"
We shall pass the above variable into the final ANC creation.
Create the Azure Network Connection
We are creating a Azure Network Connection that includes the following:
Display Name of the network – $ancdname
Azure Subscription ID – $subscriptionID
Azure Subscription Name – $subscriptionName
Type – There are two types we are selecting Azure AD join – azureADJoin
Resource Group ID – The resource group within Azure – $win365RGID
Virtual Network ID – The VNET within Azure – $win365VNETID
Subnet ID – The subnet for W365 within VNET – $win365SubID
# Create the ANC for Windows 365 with AAD join type
try
{
write-host "Create the ANC for Windows 365 with AAD join type"
$params = @{
    displayName = "$ancdname"
    subscriptionId = "$subscriptionID"
    type = "$ancjointype"
    subscriptionName = "$subscriptionName"
    resourceGroupId = "$win365RGID"
    virtualNetworkId = "$win365VNETID"
    subnetId = "$win365SubID"
}

New-MgBetaDeviceManagementVirtualEndpointOnPremiseConnection -BodyParameter $params -Debug
}
catch
{
    Write-Host $_.Exception.Message -ForegroundColor Yellow
}
# Import module Az and MS Graph
Import-Module Az.Accounts
Install-Module Microsoft.Graph

# Connect to the Azure Subcription
Connect-AzAccount

# Get existing context
$currentAzContext = Get-AzContext

# Your subscription. This command gets your current subscription
$subscriptionID = $currentAzContext.Subscription.Id

# Your subscription. This command gets your current subscription name
$subscriptionName = $currentAzContext.Subscription.Name

# ANC Display Name
$ancdname = "ANC-W365-Sub01"

# Join Ype for the Azure Network Connection
# Two types Azure AD and Hyrbird "azureADJoin" or "hybridAzureADJoin"
$ancjointype = "azureADJoin"

# Get your Win365 Resouce Group id for RG Name - W365-AVD-RG01
# Put your RG Name
$win365RGID = Get-AzResourceGroup -Name "W365-AVD-RG01" | Select-Object -ExpandProperty ResourceId

# Get your Azure VNET id used for Windows 365 Cloud PC
# Put your VNET Name
$win365VNETID = Get-AzVirtualNetwork -Name "W365-AVD-VNET01" | Select-Object -ExpandProperty Id

# Get your Subnet ID within the Azure VNET for Windows 365 Cloud PC
# Put your VNET Name
$win365VNET = Get-AzVirtualNetwork -Name "W365-AVD-VNET01"

# Enter your Subnet Name
$win365SubID = Get-AzVirtualNetworkSubnetConfig -Name "W365Workload-Sub01" -VirtualNetwork $win365VNET | Select-Object -ExpandProperty Id

# Connec to MS Graph for Cloud PC W365
Connect-MgGraph -Scopes "CloudPC.ReadWrite.All"

# Create the ANC for Windows 365 with AAD join type
try
{
write-host "Create the ANC for Windows 365 with AAD join type"
$params = @{
    displayName = "$ancdname"
    subscriptionId = "$subscriptionID"
    type = "$ancjointype"
    subscriptionName = "$subscriptionName"
    resourceGroupId = "$win365RGID"
    virtualNetworkId = "$win365VNETID"
    subnetId = "$win365SubID"
}

New-MgBetaDeviceManagementVirtualEndpointOnPremiseConnection -BodyParameter $params -Debug
}
catch
{
    Write-Host $_.Exception.Message -ForegroundColor Yellow
}
I hope you will find this helpful information for creating Azure Network Connection using PowerShell. Please let me know if I have missed any steps or details, and I will be happy to update the post.
A good security practice would restrict the access of business-critical applications only to trusted devices within the organizations. On personal and untrusted devices, there should deny access to business applications. This strategy helps in Data Loss Prevention and company information compromise, which is vital in today’s landscape.
In our scenario, we will allow Access to Cloud Apps – ServiceNow, GitHub & Atlassian Cloud only on the Windows 365 Cloud PC/Azure Virtual Desktop (AVD) and all other devices will block access. To achieve this outcome, we shall be using Azure Active Directory (AAD) Conditional Access Policies & further use device filtering on “Cloud PC”
Pre-requsites
You have Enterprise Apps integrated with Azure Active Directory (ServiceNow, GitHub Enterprise, Atlassian Cloud & Office 365)
Make sure these applications are working with Azure AD credentials and assigned multi-factor authentication
Azure AD Group with end-users to whom you want to apply the restrictions
Necessary Azure AD P1 or P2 license
Portals on AAD Conditional Access Policy (CAP)
Following are all the portals where you can configure the CAP via different consoles. However, the outcome is going to be the same.
Microsoft Endpoint Manager admin Center (Microsoft Intune)
Before rolling out in production at this phase, only use the report-only mode. Once satisfied with your testing, you can select Enable Policy – On. Final click on Create
Insights & Reporting
You can notice my user name shows the blocking policy is applying when I access the CloudApp -Office365 from a personal device.
I hope you will find this helpful information for restricting Cloud Apps access to only Cloud PC. Please let me know if I have missed any steps or details, and I will be happy to update the post.
There is numerous guidance on the brand new feature of deploying Microsoft Store applications via Microsoft Intune. A critical aspect of Application Update may bite back if the GPOs from the legacy enivornment for Microsoft Store are setup.
App Update (MS Store Apps)
By default, all the applications that are deployed from the Microsoft Store are automatically kept up to date with the latest version of the app. There are no extra configurations or guidance required here.
In my scenario, I have deployed a few apps using the new feature that will auto-update itself throughout the application’s lifecycle as when Microsoft Store releases the updates.
The deal breaker for auto App Update
In specific environments previously, you might have configured group policies around Microsoft Store. In particular, we are looking at – Turn off Automatic Download and Install of updates policy. For this feature to work from Intune, this policy should not be enabled.
Please ensure you have this policy “Not Configured” or “Disabled” else you might be wondering why my UWP applications deployed from Microsoft Intune are not getting updated.
I hope you will find this quick valuable tip for the new MS Store Apps via Intune. Please let me know if I have missed any steps or details, and I will be happy to update the post.
In the previous blog post, I demonstrate how to create a Windows 11 Multi-session golden image for AVD. In today’s post, I want to showcase how to create a custom Windows 11 Enterprise 22H2 + Microsoft 365 for Windows 365 Cloud PC. (Note its not multi-session and instead, its Enterprise edition for 1×1 mapping of desktop/user aka Full Clone)
Why will you create a custom Windows 11 Ent Windows 365 Cloud PC Golden Image?
There are situations where you want to create a custom image with all corporate applications pre-installed (VPN or Zero trust agent, EDR/XDR Solutions agents or Anti-virus agent pre-installed). You may argue we can deploy those applications later using Win32 app deployment via Intune. But still, few security teams and corporations would like to have it available from the start.
Pre-requisites
Following are the pre-requisites before you begin
PowerShell 5.1 and above
Azure Subscription
Permissions within the Auzre Subscription for Azure Compute
Assumption
You have an existing Resource Group (RG)
You have an existing Azure Virtual Network (VNET)
You have an existing workload subnet within the VNET
Identify the VM Size you will be using for the golden image
To start working with Azure PowerShell, sign in with your Azure credentials.
Connect-AzAccount
Identify the Windows 11 Multi-session (Marketplace Image)
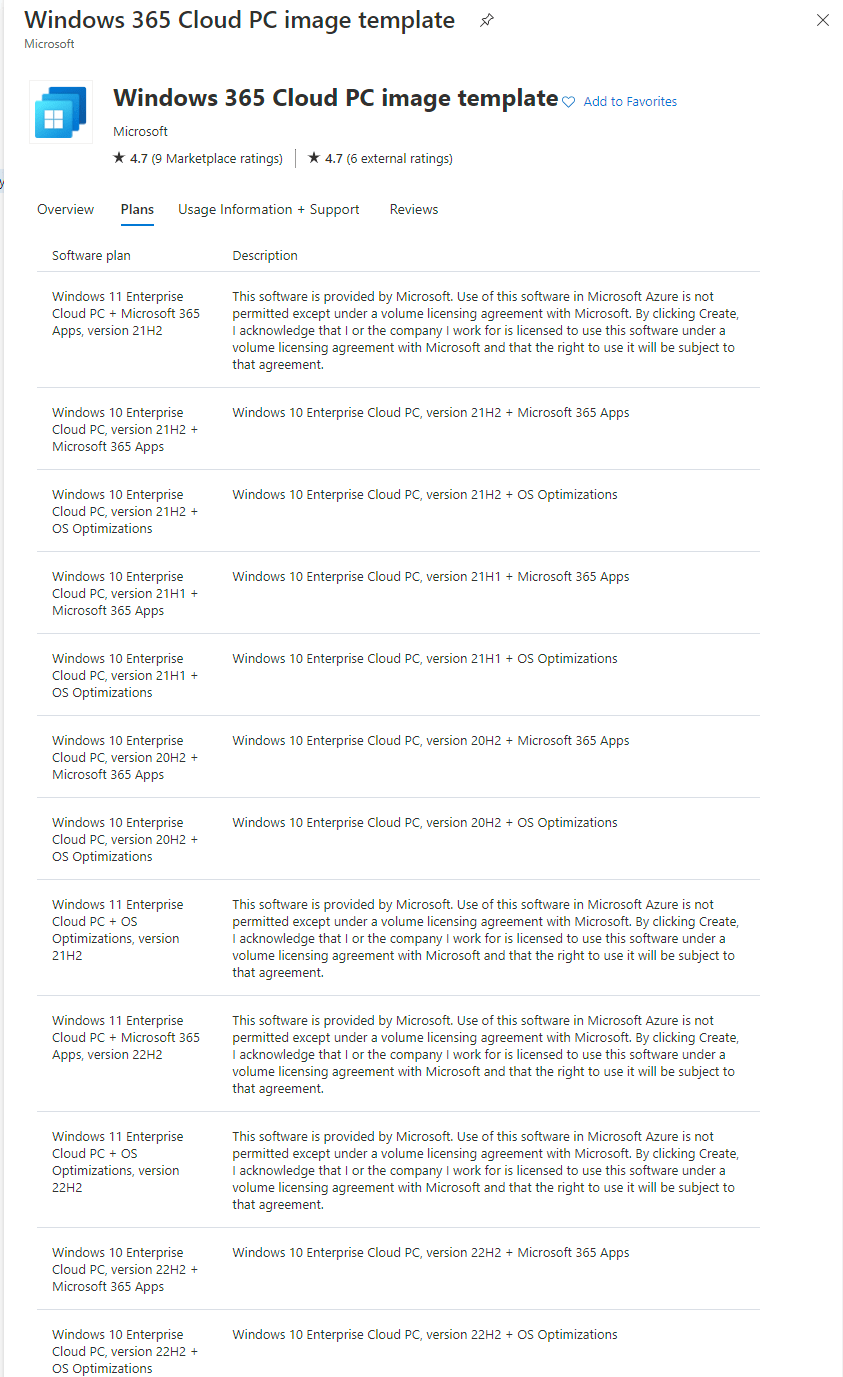
Many versions of Windows 365 Cloud PC – Windows 11/10 Enterprise edition marketplace images from Microsoft. The operating systems is already optimized (Microsoft VDI Optimizations) for Cloud PC, and the only difference is with or without Microsoft 365.
Let’s identify what is available within the marketplace.
We are going to use the Windows 11 22H2 Enterprise + Microsoft 365 Apps within this script
Variable Region
Delcare all the variable within this section. Lets take a look at what we are declaring within the script:
Existing Resource Group within the Azure Subscription (AZ104-RG)
A location where you are deploying this virtual machine (Australia East)
Name of the golden image virtual machine (Win365-GI01)
NIC Interface name for the virtual machine (Win365-GI01-nic)
RG of the VNET (In my case they are same AZ104-RG, they can be seperate too and hence a independent variable)
Name of the existing subnet within the vNET (AZ104-VDI-Workload-L1)
Name of the existing VNET (AZ104-RG-vnet)
Mapping of the exisitng VNET
Mapping of the existing subnet
T-shirt size of the golden image we are deploying (Standard_D2s_v3)
Gallery details of the image
Published – MicrosoftWindowsDesktop
Offer – windows-ent-cpc
SKU – win11-22h2-ent-cpc-m365
version – Offcourse latest
Get credentials – A local admin account is created on the golden image (A input box to capture the uisername and password of your choice)
# Existing Resource Group to deploy the VM
$rgName = "AZ104-RG"

# Geo Location to deploy the VM
$location = "Australia East"

# Image template name
$vmName = "Win365-GI01"

# Networking Interfance Name for the VM
$nicName = "$vmName-nic"

# Resource Group for VNET
$vnetrgName = "AZ104-RG"

# Existing Subnet Name
$Existsubnetname = "AZ104-VDI-Workload-L1"

# Existing VNET Name
$Existvnetname = "AZ104-RG-vnet"

# Existing VNET where we are deploying this Virtual Machine
$vnet = Get-AzVirtualNetwork -Name $Existvnetname -ResourceGroupName $vnetrgName

# Existing Subnet within the VNET for the this virtual machine
$subnet = Get-AzVirtualNetworkSubnetConfig -Name $Existsubnetname -VirtualNetwork $vnet

# T-shirt size of the VM
$vmSize = "Standard_D2s_v3"

# Gallery Publisher of the Image - Microsoft
$publisher = "MicrosoftWindowsDesktop"

# Version of Windows 10/11
$offer = "windows-ent-cpc"

# The SKY ending with avd are the multi-session
$sku = "win11-22h2-ent-cpc-m365"

# Choosing the latest version
$version = "latest"

# Setting up the Local Admin on the VM
$cred = Get-Credential `
   -Message "Enter a username and password for the virtual machine."
Execution block
Execution code block within this section. Lets take a look at what we are we executing within the script:
First its creating the network interface for the virtual machine (Win365-GI01)
Next, under the variable $VM all virtual machine configurations
Tshirt size of the virtual machine
Credentials for the local admin (username/password)
The network interface assignment along with the delete option (Note delete option is essential or/else during deletion of VM it will not delete the network interface)
The gallery image, sku, offer from the Microsoft Market Place gallery
The OS disk assignment along with the delete option (Note delete option is essential or/else during deletion of VM it will not delete the disk)
The configuration around “Trusted Platform” and enabling of TPM and Secure Boot
The final command to create the virtual machine with all the above configurations
# Create New network interface for the virtual machine
$NIC = New-AzNetworkInterface -Name $nicName -ResourceGroupName $vnetrgName -Location $location -Subnet $subnet

# Creation of the new virtual machine with delete option for Disk/NIC together
$vm = New-AzVMConfig -VMName $vmName -VMSize $vmSize

$vm = Set-AzVMOperatingSystem `
   -VM $vm -Windows `
   -ComputerName $vmName `
   -Credential $cred `
   -ProvisionVMAgent `
   -EnableAutoUpdate

# Delete option for NIC
$vm = Add-AzVMNetworkInterface -VM $vm `
   -Id $NIC.Id `
   -DeleteOption "Delete"

$vm = Set-AzVMSourceImage -VM $vm `
   -PublisherName $publisher `
   -Offer $offer `
   -Skus $sku `
   -Version $version

# Delete option for Disk
$vm = Set-AzVMOSDisk -VM $vm `
   -StorageAccountType "StandardSSD_LRS" `
   -CreateOption "FromImage" `
   -DeleteOption "Delete"

# The sauce around enabling the Trusted Platform
$vm = Set-AzVmSecurityProfile -VM $vm `
   -SecurityType "TrustedLaunch"

# The sauce around enabling TPM and Secure Boot
$vm = Set-AzVmUefi -VM $vm `
   -EnableVtpm $true `
   -EnableSecureBoot $true

New-AzVM -ResourceGroupName $rgName -Location $location -VM $vm
# Step 1: Import module
#Import-Module Az.Accounts

# Connect to the Azure Subcription
#Connect-AzAccount

# Get existing context
$currentAzContext = Get-AzContext

# Your subscription. This command gets your current subscription
$subscriptionID=$currentAzContext.Subscription.Id

# Command to get the Multi-session Image in Gallery
# Details from this command will help in filling out variables below on Gallery Image
# Get-AzVMImageSku -Location australiaeast -PublisherName MicrosoftWindowsDesktop -Offer windows-ent-cpc

# Existing Resource Group to deploy the VM
$rgName = "AZ104-RG"

# Geo Location to deploy the VM
$location = "Australia East"

# Image template name
$vmName = "Win365-GI01"

# Networking Interfance Name for the VM
$nicName = "$vmName-nic"

# Resource Group for VNET
$vnetrgName = "AZ104-RG"

# Existing Subnet Name
$Existsubnetname = "AZ104-VDI-Workload-L1"

# Existing VNET Name
$Existvnetname = "AZ104-RG-vnet"

# Existing VNET where we are deploying this Virtual Machine
$vnet = Get-AzVirtualNetwork -Name $Existvnetname -ResourceGroupName $vnetrgName

# Existing Subnet within the VNET for the this virtual machine
$subnet = Get-AzVirtualNetworkSubnetConfig -Name $Existsubnetname -VirtualNetwork $vnet

# T-shirt size of the VM
$vmSize = "Standard_D2s_v3"

# Gallery Publisher of the Image - Microsoft
$publisher = "MicrosoftWindowsDesktop"

# Version of Windows 10/11
$offer = "windows-ent-cpc"

# The SKY ending with avd are the multi-session
$sku = "win11-22h2-ent-cpc-m365"

# Choosing the latest version
$version = "latest"

# Setting up the Local Admin on the VM
$cred = Get-Credential `
   -Message "Enter a username and password for the virtual machine."

# Create New network interface for the virtual machine
$NIC = New-AzNetworkInterface -Name $nicName -ResourceGroupName $vnetrgName -Location $location -Subnet $subnet

# Creation of the new virtual machine with delete option for Disk/NIC together
$vm = New-AzVMConfig -VMName $vmName -VMSize $vmSize

$vm = Set-AzVMOperatingSystem `
   -VM $vm -Windows `
   -ComputerName $vmName `
   -Credential $cred `
   -ProvisionVMAgent `
   -EnableAutoUpdate

# Delete option for NIC
$vm = Add-AzVMNetworkInterface -VM $vm `
   -Id $NIC.Id `
   -DeleteOption "Delete"

$vm = Set-AzVMSourceImage -VM $vm `
   -PublisherName $publisher `
   -Offer $offer `
   -Skus $sku `
   -Version $version

# Delete option for Disk
$vm = Set-AzVMOSDisk -VM $vm `
   -StorageAccountType "StandardSSD_LRS" `
   -CreateOption "FromImage" `
   -DeleteOption "Delete"

# The sauce around enabling the Trusted Platform
$vm = Set-AzVmSecurityProfile -VM $vm `
   -SecurityType "TrustedLaunch"

# The sauce around enabling TPM and Secure Boot
$vm = Set-AzVmUefi -VM $vm `
   -EnableVtpm $true `
   -EnableSecureBoot $true

New-AzVM -ResourceGroupName $rgName -Location $location -VM $vm
Note – It will give you a pop-up box for entering the username and password for the local account, and in under 10 mins you will see your virtual machine within the Azure portal
Next Steps on Golden Image
Now that the virtual machine is ready following are the next steps involved:
Using Azure Bastion console and install the required applications
Zero Trust Agent
EDR/XDR Agent
Antivirus Software Agent
Line of Business Apps
Generalize and sysprep and shutdown the image
Capture the image to the Azure Compute Galleries
Add the image within Microsoft Intune
I hope you will find this helpful information for deploying a golden image within Azure – Virtual Machine to deploy the custom Image for Windows 365 Cloud PC. Please let me know if I have missed any steps or details, and I will be happy to update the post.
In my previous post, I had demonstrated the new reports (in-preview) Windows 365 Cloud PC – New Reports – Connection quality & Low Utilization. Today, I will showcase how to generate the report of “Cloud PCs with low utilization” using PowerShell and MS Graph API with beta modules on Windows 365 Cloud PC.
Connect to MS Graph API
Step 1 – Install the MS Graph Powershell Module
#Install Microsoft Graph Module
PS C:WINDOWSsystem32> Install-Module Microsoft.Graph.Beta
Step 2 – Connect to scopes and specify which API you want to authenticate. If you are only doing read-only operations, I suggest you connect to “CloudPC.Read.All” in our case, we are creating the policy, so we need to change the scope to “CloudPC.ReadWrite.All”
#Read-only
PS C:WINDOWSsystem32> Connect-MgGraph -Scopes "CloudPC.Read.All"
Welcome To Microsoft Graph!

OR

#Read-Write
PS C:WINDOWSsystem32> Connect-MgGraph -Scopes "CloudPC.ReadWrite.All"
Welcome To Microsoft Graph!
Step 3 – Check the User account by running the following beta command.
#Beta User
PS C:WINDOWSsystem32> Get-MgBetaUser -UserId admin@wdomain.com
Note – You will have to enter the OutFile path where you want to save the report in my example C:\Temp\abc.csv
The actual report in the Intune Portal looks like the following – The same result is now available within the Value section of the CSV (Note – The formatting of the output is terrible, some excel work will be required to format the data properly)
I hope you will find this helpful information for generating low utilization report for Cloud PC using PowerShell. Please let me know if I have missed any steps or details, and I will be happy to update the post.
When you deploy your Windows 365 Cloud PC, you can use a Microsoft Gallery Image or a Custom Image from Azure. The Microsoft Gallery image is a good starting point for most deployments, as it’s already optimized for Cloud PC. In my scenario, I have leveraged the Windows 11 Enterprise + OS Optimizations – 22H2 gallery image.
Note – These steps are only applicable in situations where-in you are not using Microsoft Teams.
Microsoft Teams is an excellent collaboration tool if the organization leverages it.
Post the Cloud PC Provisioning, the end-users see the Chat Icon for MS Team and the Microsoft Teams applications are installed within the Apps & Features. In this scenario, I am not using Microsoft Teams hence I have decided to Disable the Icon & Uninstall MS Team from the Cloud PC fleet.
Disable Chat Icon – Intune
Let’s see how to disable the Chat Icon gracefully for all end-users using Microsoft Intune
Go to Devices and then scroll down to Configuration Profiles
Click on Create New Profile
Select Platform – Windows 10 and later
Profile type – Settings Catalog
Enter a Name – Disable Win11ChatIcon
Settings picker type – configure chat icon
Category select – Experience
Results select – Configure Chat Icon
Set the value as disable
Assign the policy to the AAD group – In my case, I have assigned to the “Win365-DeviceGroup”
Set the Configure Chat Icon – Disabled
After the sync-up, I noticed the Chat Icon from the taskbar disappeared on all Windows 365 Cloud PC devices.
Un-install MS Team – Scripts Intune
Within the Microsoft gallery image, you will notice the Microsoft Team is installed by default, and we want to uninstall the software using Powershell Scripts. A quick check within Apps & Features shows that Microsoft Teams is already installed.
Assign to the policy to the AAD group – In my case I have assigned to the “Win365-DeviceGroup”
# Remove Teams Application

try {
    $fetchteamsapp = @(Get-AppxPackage -name '*teams' -ErrorAction stop)
}
catch {
    $ErrorMessage = $_.Exception.message
    write-error ('Error getting the teams app ' + $ErrorMessage)
    Exit
}
if ($fetchteamsapp -ne $null) {
    $uninstallteamsapp = @(remove-appxpackage -package "MicrosoftTeams_22287.702.1670.9453_x64__8wekyb3d8bbwe" -ErrorAction stop)
}
else {
    write-host 'Successfully un-install the MS Teams.'
    exit
}
Note – Replace your MS Team version with whatever you have within your environment
I hope you will find this helpful information for disabling icon and uninstalling Microsoft teams using Intune + Powershell scripts. Please let me know if I have missed any steps or details, and I will be happy to update the post.
I always knew about the short term restore options of a Windows 365 Cloud PC. However, I never paid attention to the long term restore point though it was in front of my eyes all the time. Let’s take a deeper look at the restore options.
The above policy is configured with restore points every 4 hours. The Windows 365 Cloud PC will have 10 restore points saved at intervals of every 4 hours defined in the user setting. For example, if you choose 4 hour intervals, a Cloud PC will have 10 restore points spread out every four hours over the last 40 hours. (The box highlighted in green is the 40 hours period of the short term restore points.)
Long Term Restore
Now comes the eye-opener that has been in the console. However, I never paid attention to its dates and time. In addition to these configurable short-term restore points, four long-term restore points aren’t configurable. These long-term restore points are saved every seven days. The box highlighted in red is the 7 days of the long term restore points. (Pay attention to the dates precisely 7 days apart)
Note in both scenarios of short- and long-term restore points, it automatically removes the old and adds the new restore points. Ensure the end-user/admin teams understand the impact of a long term restore point, as it can have an unpredictable outcome of application/configurations missing or the desktop becoming unusable. The best practice here is to restore to the earliest possible point, whether short- or long-term.
I hope you will find this helpful information for understanding the restore points in Cloud PC. Please let me know if I have missed any steps or details, and I will be happy to update the post.
There are numerous posts that talk about creating the Windows 365 Cloud PC – User Settings. In this blog post, I will demonstrate how to create user settings using PowerShell and MS Graph API with beta modules on Windows 365 Cloud PC.
Connect to MS Graph API
Step 1 – Install the MS Graph Powershell Module
#Install Microsoft Graph Module
PS C:WINDOWSsystem32> Install-Module Microsoft.Graph.Beta
Step 2 – Connect to scopes and specify which API you want to authenticate. If you are only doing read-only operations, I suggest you connect to “CloudPC.Read.All” in our case, we are creating the policy, so we need to change the scope to “CloudPC.ReadWrite.All”
#Read-only
PS C:WINDOWSsystem32> Connect-MgGraph -Scopes "CloudPC.Read.All"
Welcome To Microsoft Graph!

OR

#Read-Write
PS C:WINDOWSsystem32> Connect-MgGraph -Scopes "CloudPC.ReadWrite.All"
Welcome To Microsoft Graph!
Permissions for MS Graph API
Step 3 – Check the User account by running the following beta command.
#Beta User Check
PS C:WINDOWSsystem32> Get-MgBetaUser -UserId admin@wdomain.com
Now that we have the User Settings created, it’s time to assign it to an AAD group. We need to follow the following procedure
AAD Group (Copy – Object ID)
I have an existing AAD (Azure Active Directory) group called “Win365-Users” and I plan to use this group for assignment to this User Settings. The important step here is to make a note of the “Object ID” of the AAD group you are planning to assign. Please make sure you copy this ID.
User Settings (Copy ID)
Copy the ID of the previously created User Settings. We need to copy this ID for the assignment. Use the command – Get-MgDeviceManagementVirtualEndpointUserSetting | FT. Note if multiple CPC user settings, select the relevant ID.
I hope you will find this helpful information for creating/assigning the user settings using PowerShell. Please let me know if I have missed any steps or details, and I will be happy to update the post.
Upon further digging, the conflict is caused because of the out-of-the-box Windows 365 Security Baseline. which includes a similar policy under Remote Desktop Services.
Go to the Device (CPC-aresh-eo0fg) of concern and navigate into the Device configuration. We can see there is a conflict between the previously created RDP Device Redirection (config profiles) and the out-of-the-box Windows 365 Security Baseline (Preview)
Fix forward
I kept the Windows 365 Security Baseline untouched, changed the Configurations Profiles, edited the policy, and removed the duplicate setting on “Block drive redirection”. This resolved the conflict situation
I hope you will find this helpful information for troubleshooting a conflict of policies VS baselines. Please let me know if I have missed any steps or details, and I will be happy to update the post.


Recent Comments