
In the previous blog post, I demonstrate how to create a Windows 11 Multi-session golden image for AVD. In today’s post, I want to showcase how to create a custom Windows 11 Enterprise 22H2 + Microsoft 365 for Windows 365 Cloud PC. (Note its not multi-session and instead, its Enterprise edition for 1×1 mapping of desktop/user aka Full Clone)
Why will you create a custom Windows 11 Ent Windows 365 Cloud PC Golden Image?
There are situations where you want to create a custom image with all corporate applications pre-installed (VPN or Zero trust agent, EDR/XDR Solutions agents or Anti-virus agent pre-installed). You may argue we can deploy those applications later using Win32 app deployment via Intune. But still, few security teams and corporations would like to have it available from the start.
Pre-requisites
Following are the pre-requisites before you begin
- PowerShell 5.1 and above
- Azure Subscription
- Permissions within the Auzre Subscription for Azure Compute
- Assumption
- You have an existing Resource Group (RG)
- You have an existing Azure Virtual Network (VNET)
- You have an existing workload subnet within the VNET
- Identify the VM Size you will be using for the golden image
- Azure PowerShell Modules
Sign to Azure
To start working with Azure PowerShell, sign in with your Azure credentials.
Connect-AzAccountIdentify the Windows 11 Multi-session (Marketplace Image)
Many versions of Windows 365 Cloud PC – Windows 11/10 Enterprise edition marketplace images from Microsoft. The operating systems is already optimized (Microsoft VDI Optimizations) for Cloud PC, and the only difference is with or without Microsoft 365.
Let’s identify what is available within the marketplace.
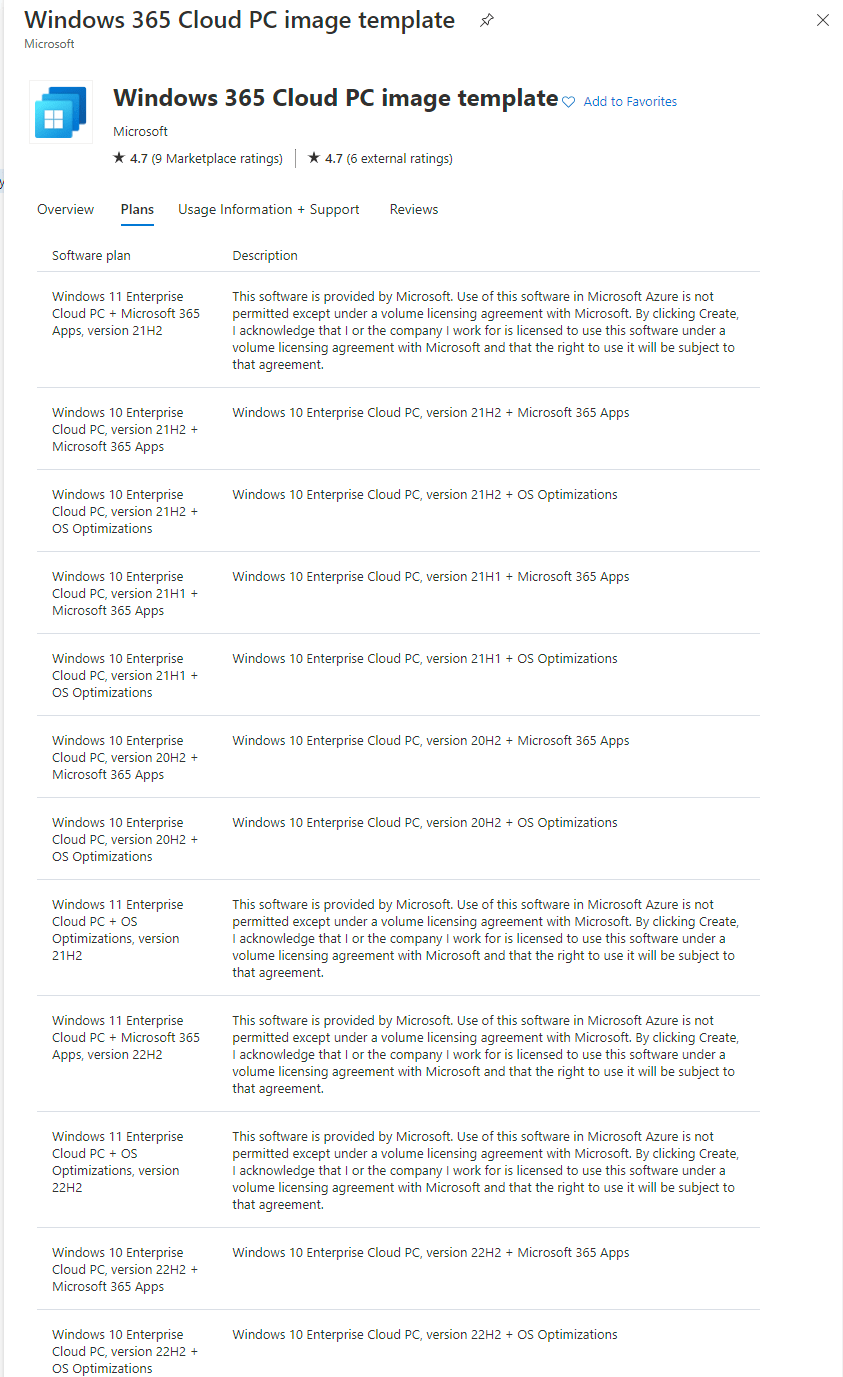
Get-AzVMImageSku -Location australiaeast -PublisherName MicrosoftWindowsDesktop -Offer windows-ent-cpc
We are going to use the Windows 11 22H2 Enterprise + Microsoft 365 Apps within this script
Variable Region
Delcare all the variable within this section. Lets take a look at what we are declaring within the script:
- Existing Resource Group within the Azure Subscription (AZ104-RG)
- A location where you are deploying this virtual machine (Australia East)
- Name of the golden image virtual machine (Win365-GI01)
- NIC Interface name for the virtual machine (Win365-GI01-nic)
- RG of the VNET (In my case they are same AZ104-RG, they can be seperate too and hence a independent variable)
- Name of the existing subnet within the vNET (AZ104-VDI-Workload-L1)
- Name of the existing VNET (AZ104-RG-vnet)
- Mapping of the exisitng VNET
- Mapping of the existing subnet
- T-shirt size of the golden image we are deploying (Standard_D2s_v3)
- Gallery details of the image
- Published – MicrosoftWindowsDesktop
- Offer – windows-ent-cpc
- SKU – win11-22h2-ent-cpc-m365
- version – Offcourse latest
- Get credentials – A local admin account is created on the golden image (A input box to capture the uisername and password of your choice)
# Existing Resource Group to deploy the VM
$rgName = "AZ104-RG"

# Geo Location to deploy the VM
$location = "Australia East"

# Image template name
$vmName = "Win365-GI01"

# Networking Interfance Name for the VM
$nicName = "$vmName-nic"

# Resource Group for VNET
$vnetrgName = "AZ104-RG"

# Existing Subnet Name
$Existsubnetname = "AZ104-VDI-Workload-L1"

# Existing VNET Name
$Existvnetname = "AZ104-RG-vnet"

# Existing VNET where we are deploying this Virtual Machine
$vnet = Get-AzVirtualNetwork -Name $Existvnetname -ResourceGroupName $vnetrgName

# Existing Subnet within the VNET for the this virtual machine
$subnet = Get-AzVirtualNetworkSubnetConfig -Name $Existsubnetname -VirtualNetwork $vnet

# T-shirt size of the VM
$vmSize = "Standard_D2s_v3"

# Gallery Publisher of the Image - Microsoft
$publisher = "MicrosoftWindowsDesktop"

# Version of Windows 10/11
$offer = "windows-ent-cpc"

# The SKY ending with avd are the multi-session
$sku = "win11-22h2-ent-cpc-m365"

# Choosing the latest version
$version = "latest"

# Setting up the Local Admin on the VM
$cred = Get-Credential `
   -Message "Enter a username and password for the virtual machine."
Execution block
Execution code block within this section. Lets take a look at what we are we executing within the script:
- First its creating the network interface for the virtual machine (Win365-GI01)
- Next, under the variable $VM all virtual machine configurations
- Tshirt size of the virtual machine
- Credentials for the local admin (username/password)
- The network interface assignment along with the delete option (Note delete option is essential or/else during deletion of VM it will not delete the network interface)
- The gallery image, sku, offer from the Microsoft Market Place gallery
- The OS disk assignment along with the delete option (Note delete option is essential or/else during deletion of VM it will not delete the disk)
- The configuration around “Trusted Platform” and enabling of TPM and Secure Boot
- The final command to create the virtual machine with all the above configurations
# Create New network interface for the virtual machine
$NIC = New-AzNetworkInterface -Name $nicName -ResourceGroupName $vnetrgName -Location $location -Subnet $subnet

# Creation of the new virtual machine with delete option for Disk/NIC together
$vm = New-AzVMConfig -VMName $vmName -VMSize $vmSize

$vm = Set-AzVMOperatingSystem `
   -VM $vm -Windows `
   -ComputerName $vmName `
   -Credential $cred `
   -ProvisionVMAgent `
   -EnableAutoUpdate

# Delete option for NIC
$vm = Add-AzVMNetworkInterface -VM $vm `
   -Id $NIC.Id `
   -DeleteOption "Delete"

$vm = Set-AzVMSourceImage -VM $vm `
   -PublisherName $publisher `
   -Offer $offer `
   -Skus $sku `
   -Version $version

# Delete option for Disk
$vm = Set-AzVMOSDisk -VM $vm `
   -StorageAccountType "StandardSSD_LRS" `
   -CreateOption "FromImage" `
   -DeleteOption "Delete"

# The sauce around enabling the Trusted Platform
$vm = Set-AzVmSecurityProfile -VM $vm `
   -SecurityType "TrustedLaunch"

# The sauce around enabling TPM and Secure Boot
$vm = Set-AzVmUefi -VM $vm `
   -EnableVtpm $true `
   -EnableSecureBoot $true

New-AzVM -ResourceGroupName $rgName -Location $location -VM $vm
Final Script
Here I will paste the entire script block for seamless execution in single run. Following is the link to my Github for this script – avdwin365mem/createnewvmwin365 at main · askaresh/avdwin365mem (github.com)
# Step 1: Import module
#Import-Module Az.Accounts

# Connect to the Azure Subcription
#Connect-AzAccount

# Get existing context
$currentAzContext = Get-AzContext

# Your subscription. This command gets your current subscription
$subscriptionID=$currentAzContext.Subscription.Id

# Command to get the Multi-session Image in Gallery
# Details from this command will help in filling out variables below on Gallery Image
# Get-AzVMImageSku -Location australiaeast -PublisherName MicrosoftWindowsDesktop -Offer windows-ent-cpc

# Existing Resource Group to deploy the VM
$rgName = "AZ104-RG"

# Geo Location to deploy the VM
$location = "Australia East"

# Image template name
$vmName = "Win365-GI01"

# Networking Interfance Name for the VM
$nicName = "$vmName-nic"

# Resource Group for VNET
$vnetrgName = "AZ104-RG"

# Existing Subnet Name
$Existsubnetname = "AZ104-VDI-Workload-L1"

# Existing VNET Name
$Existvnetname = "AZ104-RG-vnet"

# Existing VNET where we are deploying this Virtual Machine
$vnet = Get-AzVirtualNetwork -Name $Existvnetname -ResourceGroupName $vnetrgName

# Existing Subnet within the VNET for the this virtual machine
$subnet = Get-AzVirtualNetworkSubnetConfig -Name $Existsubnetname -VirtualNetwork $vnet

# T-shirt size of the VM
$vmSize = "Standard_D2s_v3"

# Gallery Publisher of the Image - Microsoft
$publisher = "MicrosoftWindowsDesktop"

# Version of Windows 10/11
$offer = "windows-ent-cpc"

# The SKY ending with avd are the multi-session
$sku = "win11-22h2-ent-cpc-m365"

# Choosing the latest version
$version = "latest"

# Setting up the Local Admin on the VM
$cred = Get-Credential `
   -Message "Enter a username and password for the virtual machine."

# Create New network interface for the virtual machine
$NIC = New-AzNetworkInterface -Name $nicName -ResourceGroupName $vnetrgName -Location $location -Subnet $subnet

# Creation of the new virtual machine with delete option for Disk/NIC together
$vm = New-AzVMConfig -VMName $vmName -VMSize $vmSize

$vm = Set-AzVMOperatingSystem `
   -VM $vm -Windows `
   -ComputerName $vmName `
   -Credential $cred `
   -ProvisionVMAgent `
   -EnableAutoUpdate

# Delete option for NIC
$vm = Add-AzVMNetworkInterface -VM $vm `
   -Id $NIC.Id `
   -DeleteOption "Delete"

$vm = Set-AzVMSourceImage -VM $vm `
   -PublisherName $publisher `
   -Offer $offer `
   -Skus $sku `
   -Version $version

# Delete option for Disk
$vm = Set-AzVMOSDisk -VM $vm `
   -StorageAccountType "StandardSSD_LRS" `
   -CreateOption "FromImage" `
   -DeleteOption "Delete"

# The sauce around enabling the Trusted Platform
$vm = Set-AzVmSecurityProfile -VM $vm `
   -SecurityType "TrustedLaunch"

# The sauce around enabling TPM and Secure Boot
$vm = Set-AzVmUefi -VM $vm `
   -EnableVtpm $true `
   -EnableSecureBoot $true

New-AzVM -ResourceGroupName $rgName -Location $location -VM $vm
Note – It will give you a pop-up box for entering the username and password for the local account, and in under 10 mins you will see your virtual machine within the Azure portal
Next Steps on Golden Image
Now that the virtual machine is ready following are the next steps involved:
- Using Azure Bastion console and install the required applications
- Zero Trust Agent
- EDR/XDR Agent
- Antivirus Software Agent
- Line of Business Apps
- Generalize and sysprep and shutdown the image
- Capture the image to the Azure Compute Galleries
- Add the image within Microsoft Intune

I hope you will find this helpful information for deploying a golden image within Azure – Virtual Machine to deploy the custom Image for Windows 365 Cloud PC. Please let me know if I have missed any steps or details, and I will be happy to update the post.
Thanks,
Aresh Sarkari